Task 1: File Incremental loads using ADF
In this example, we are going to create 2 storage accounts
- A regular Storage account to hold the source data.
- Data Lake Storage account (ADLS) where the final data will be stored.
In this exercise, we are going to load data incrementally from one file to another.
Overview:
- Storage account is a resource in Azure cloud.
- Resources are grouped within Resource group. A resource group can have many resources within it.
- Inside a storage account, files are organized into containers. A storage account can have multiple containers.
- Data inside the container is represented in BLOB format.
Step 1: Setting up the source – Creating a storage account:
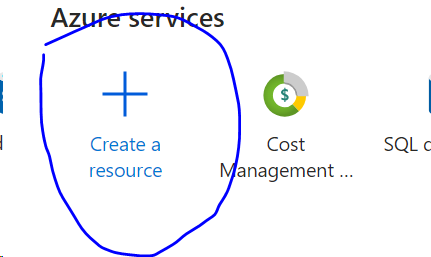
To create the regular storage account, log in to Azure and go to the home page.
- Click on Create a resource button
You will see this screen.
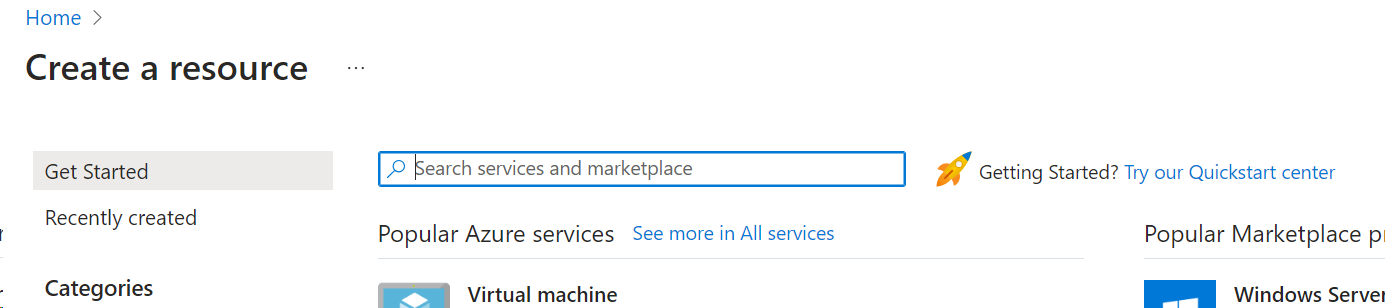
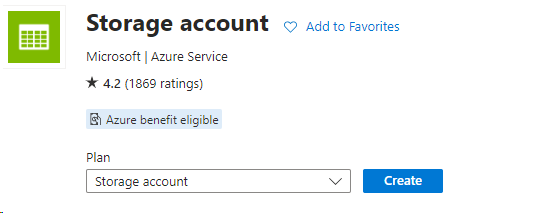
- Type Storage Account in the search bar and you will see this.
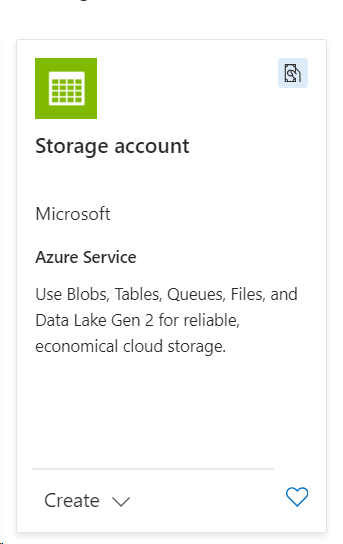
When you click this, you will be redirected to the page below,

- Click on the ‘Create’ button.
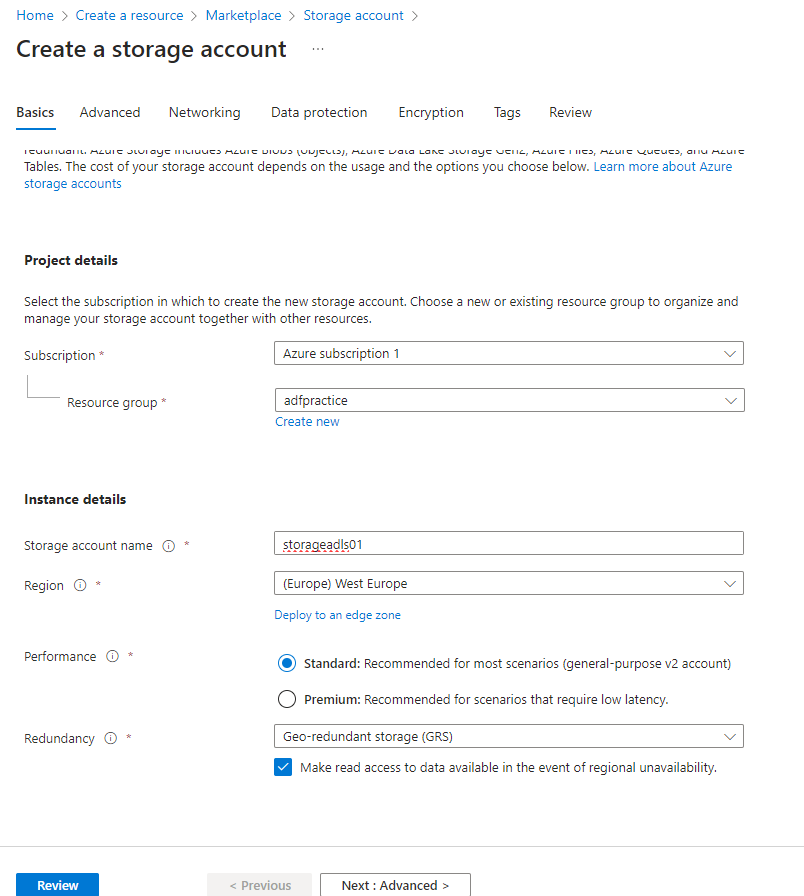
You will see the screen below.
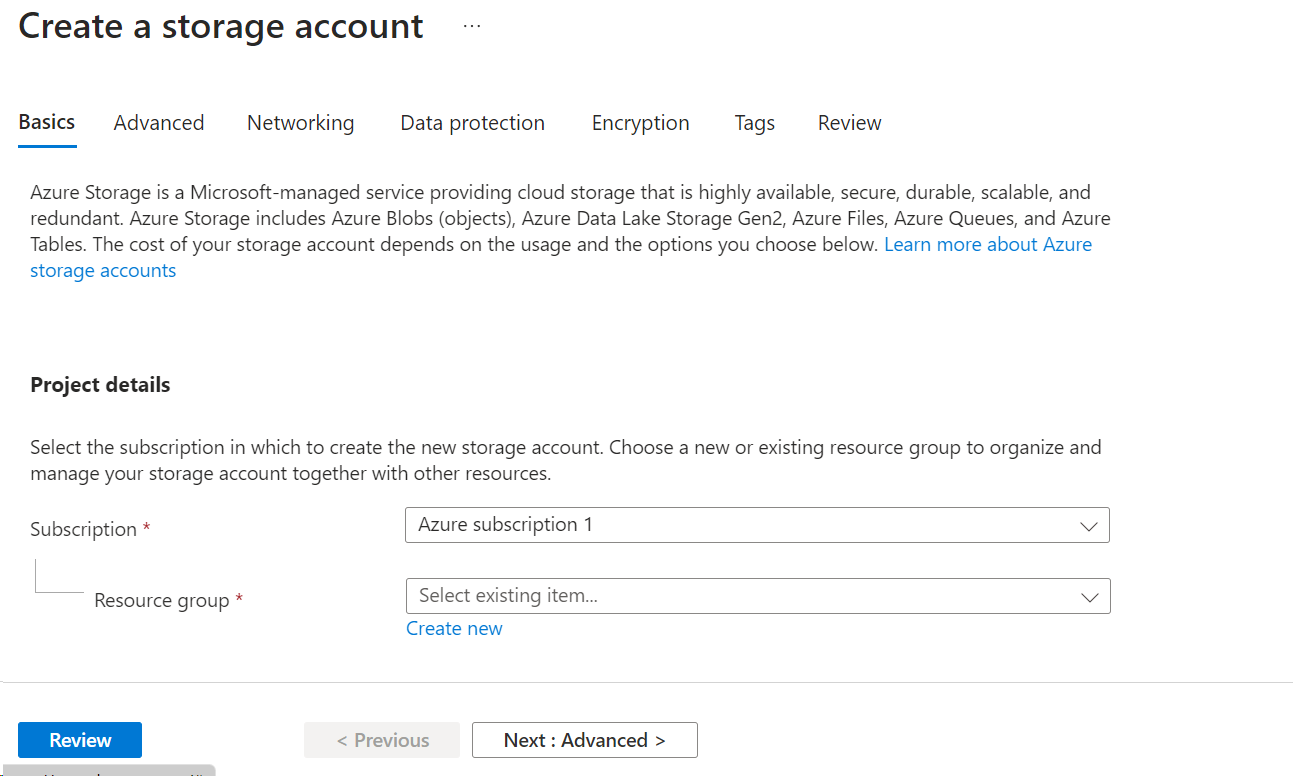
In the ‘Basics’ tab, there are few mandatory columns.
- Subscription : Select your subscription from the dropbox.
- Resource group: If you are creating a resource group for the first time, you can click on ‘Create New’ link and choose a name for the resource group. This same name can be used the next time when you want to group the resources to this group.

- Storage account name: Give a name to the storage account.

- Region : Choose a region that is closest to you.

- Performance: You can select if you want Standard or premium performance.
Standard performance: allows you to have any data service (Blob, File, Queue and Table) and it uses magnetic disk drivers
Premium performance: limits you to one specific type of blob (Page blob) and it uses solid-state drivers (SSD) for storage. Premium offers more throughput at higher cost.
Detailed comparison is in Microsoft website: Standard SSD Disks for Azure Virtual machine workloads | Microsoft Azure Blog
- Redundancy: This is a selection to provide information on how to store multiple copies of your data to avoid failures and data losses.
There are 4 choices in this section.
- LRS (Locally-redundant-storage) : This will replicate your storage account thrice within a single data centre in the primary region
- GRS (Geo-redundant-storage) : Copies data thrice within a single physical location in primary region using LRS, and also copies it in the secondary region thrice using LRS.
- ZRS (Zone-redundant-storage) : replicates your storage account across 3 azure available zones which are in separate independent physical location within a primary region.
- GZRS (Geo-zone-redundant-storage) : copies your data synchronously across three Azure availability zones in the primary region using ZRS. It then copies your data asynchronously to a single physical location in the secondary region. Within the secondary region, your data is copied synchronously three times using LRS.
Detailed information can be found in Microsoft website : Data redundancy – Azure Storage | Microsoft Learn
If we click on the next buttons, we see other advanced selections like Access Tiers, Networking, Data protection etc.
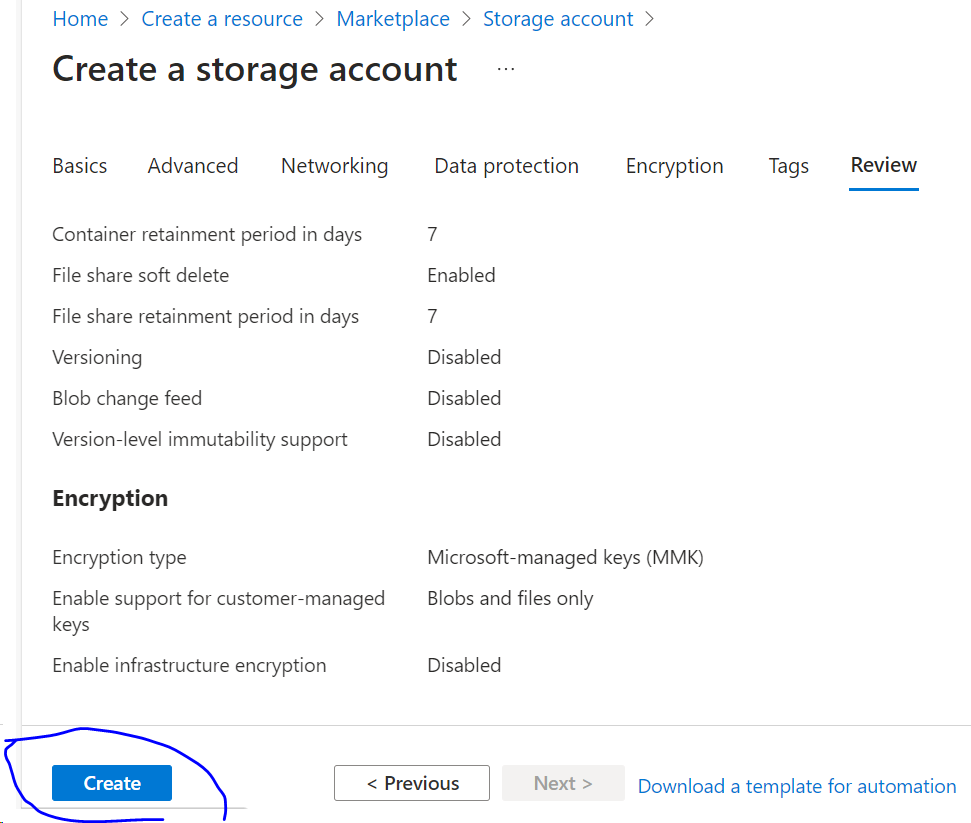
At this stage, after we enter all the basic mandatory information, click the review button on the bottom left corner.

- Click ‘Create’ on the bottom left corner.
It will start deploying and once finished, you will see the following screen.
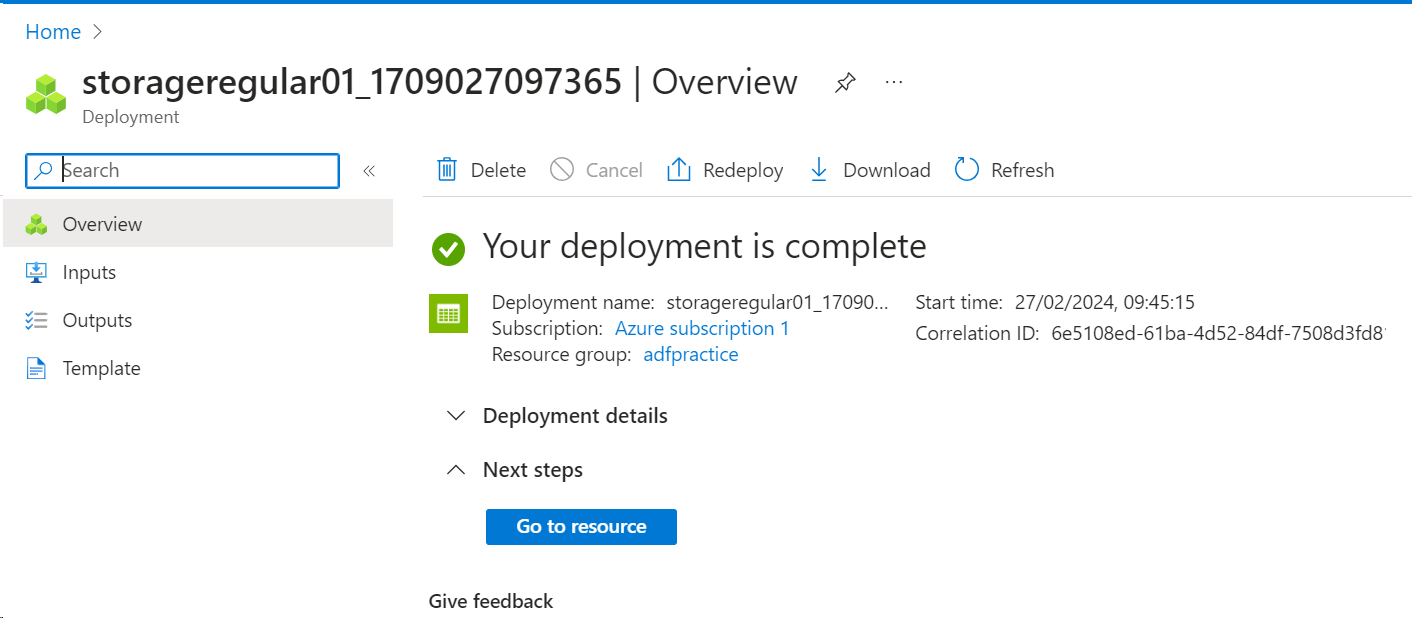
This is your first storage account.
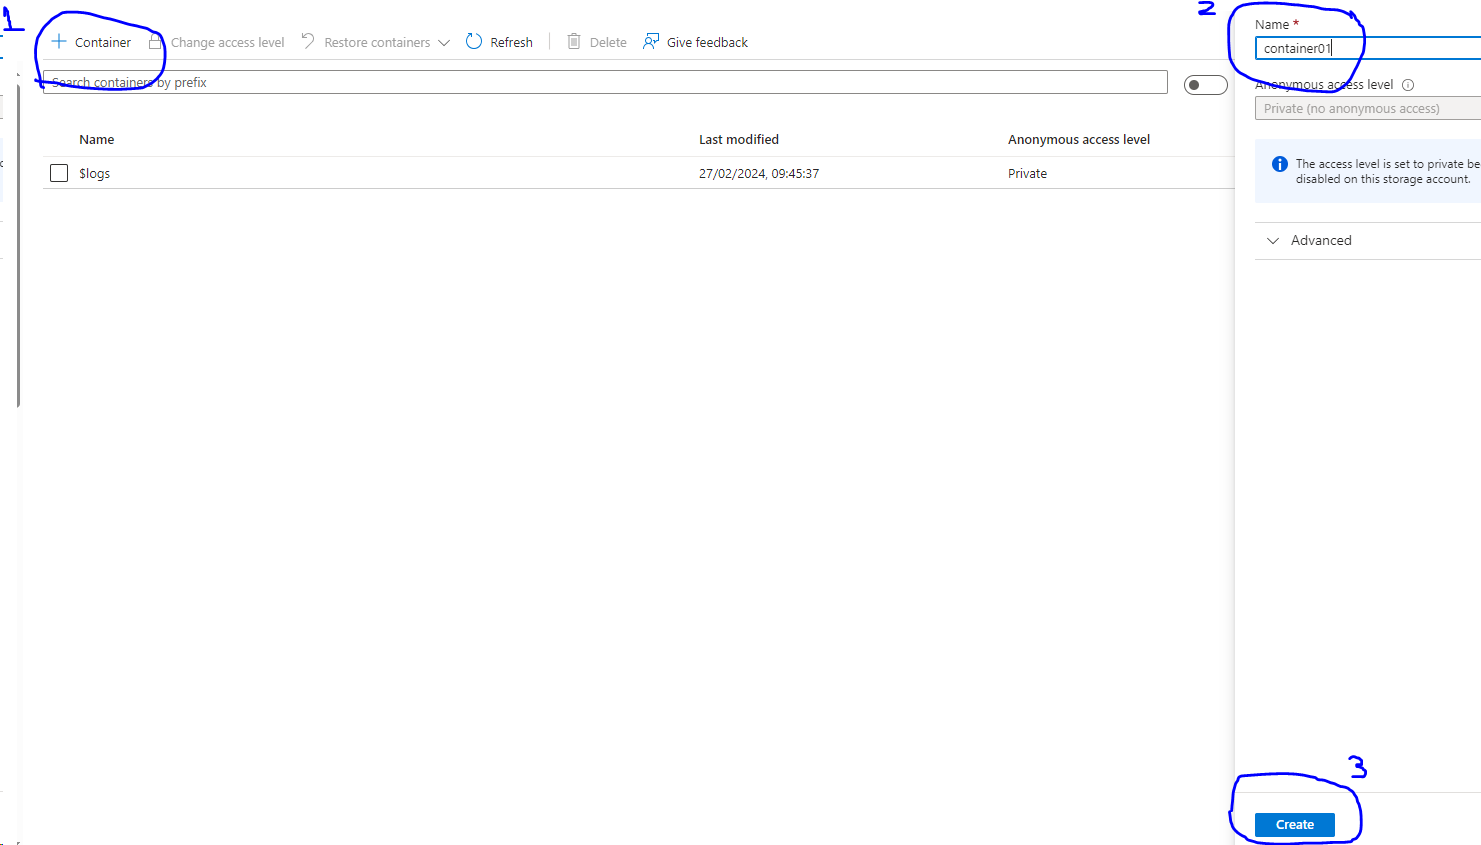
- Now inside storage account, we need to create a container to hold the source file.
- Go to the overview page of the storage account (click ‘Go to resources’)🡪 and click the Container in the left side under the Data storage section.

- Click the + Container icon and give it a Name and click create in the bottom right corner.
- Go into the container, click upload and upload your source file.
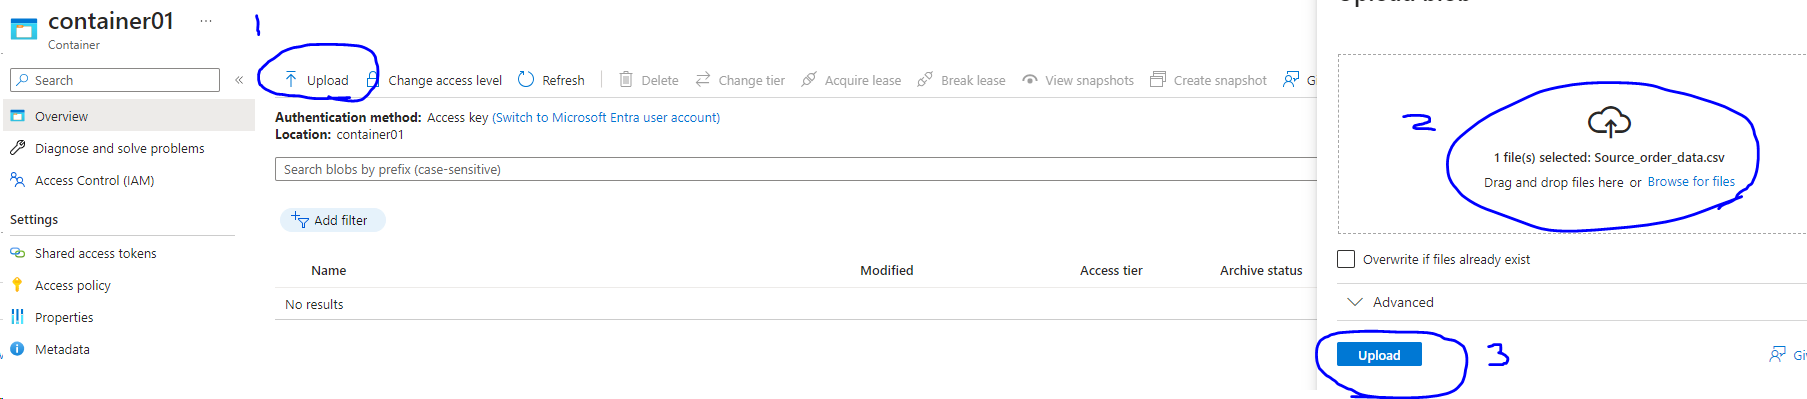
- After uploading, you can view/edit the data by clicking the … and view/edit

On clicking the view/edit we can check if the data is uploaded properly.

Now, let us create an ADLS account to store our target data and to perform upserts.
Step 2: Setting up the target environment – Creating an Azure Data Lake Storage (ADLS):
- Go to Home page and click on ‘Create a resource’

And click on Create.
- Specify the resource group. It can be the same resource group as previous selection.
- Give a storage account name and fill in the mandatory fields in the Basics tab.
- In order to create the ADLS, we need to go to the Advanced tab 🡪 and check ‘Enable hierarchical namespace’ tab

- We can now review and create this storage account.
- Once the deployment is complete, we can create a container as before.

Note: ADLS is faster, more secured than regular storage account and hence it is costly. Make sure to delete this resource once you are done with the practice.
Step 3: Create an Azure Data Factory (ADF)
This step is not necessary if we already have an ADF set up before. We can reuse the ADF after created once.
To set up Azure Data Factory,
- Go to the home page and click on ‘Create a resource’
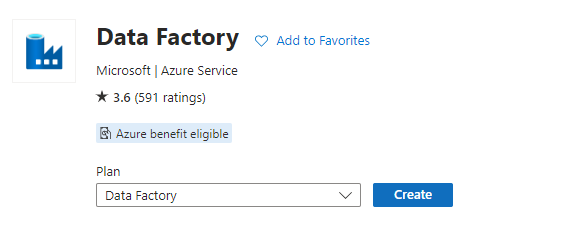
- In the search bar, search for data factory

- Click the ‘Create’ button
- Select the resource group (you can use the existing one) and give a name to your data factory and select the appropriate region. The version is by default V2.
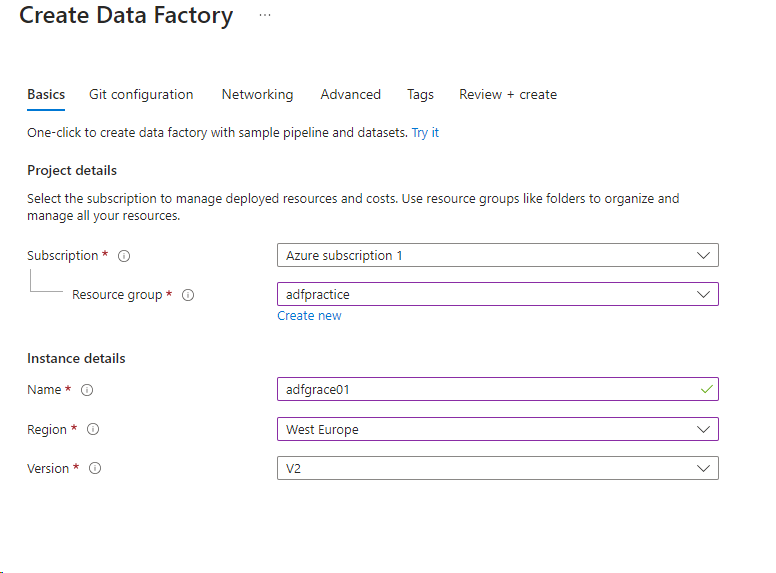
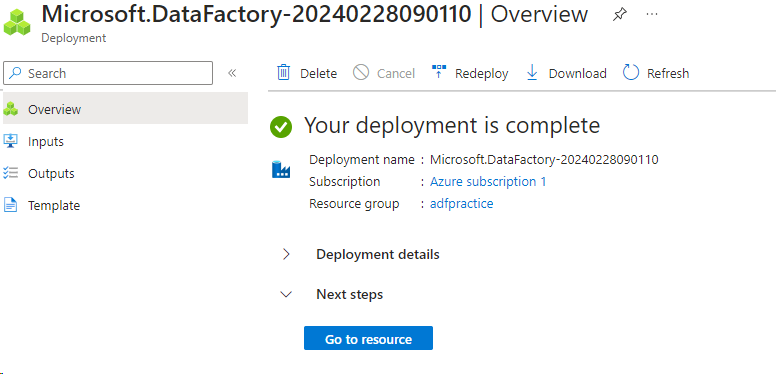
- Click on Review + Create 🡪 Create
Now the ADF is ready.
- Click on ‘Go to resource’ and you will see the following screen
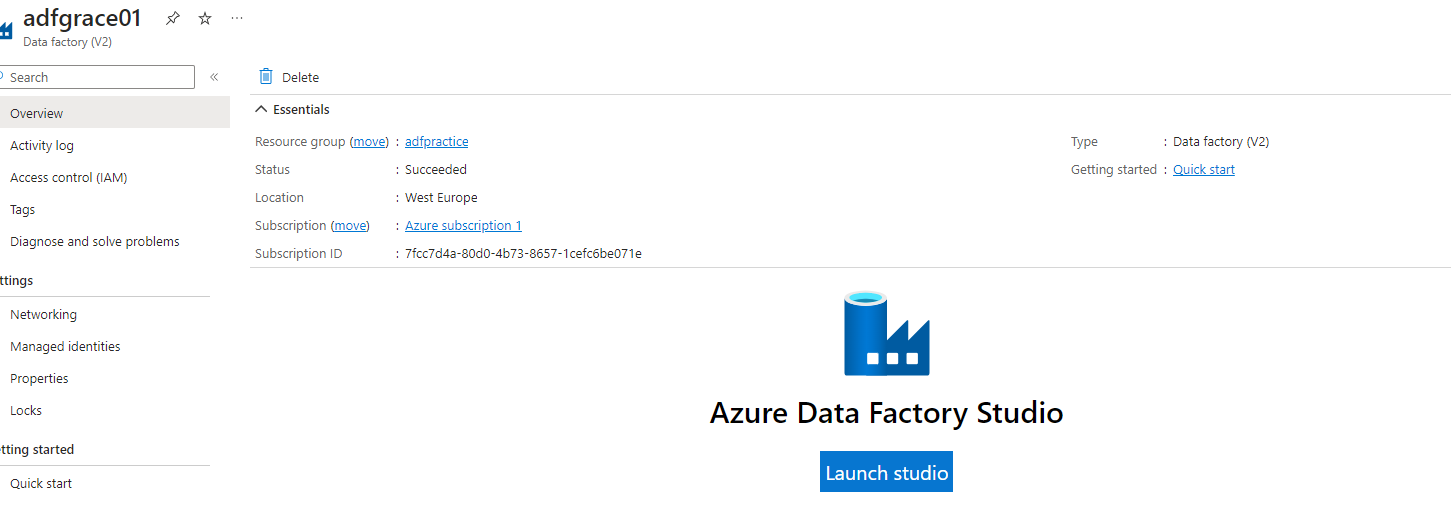
- Click the ‘Launch studio’ button and it will redirect you to a new window.
Step 4: Create a pipeline to Copy Data from source to target
We need to create an ADF Resource called ‘Pipeline’ to perform Data Import Operations.
A Pipeline can be divided into specific operations called ‘Activities’.
Example Activities:
Copy Data
Data Flow
Power Query
For Loop
Lookup
Stored Procedure
To work with any Pipeline for ETL operations, we also need connections. These connections can be reused by other ETL Pipelines within ADF. These connections are called ‘Linked Service’.
These connections are established by one internal Azure Data Factory component called Integration Runtime (IR).
For Azure Data Connections (Ex: Azure SQL Database, Azure SQL Pool, etc..) an Automated IR will be used during Pipeline Design & Execution.
For Non-Azure Data Connections (Ex: Your Local SQL Server Database) we need to install one IR for Pipeline Design & Execution. This is called Self Hosted IR.
Every Pipeline in ADF has following Entities:
1. Linked Service : Connection Details required for ETL [Ex: Storage, Database]
2. Dataset : Actual content used for ETL [Ex: File, Tables ]
3. Activities : Operations we perform on the Dataset
Copy Data : This activity is used for Basic ETL Operations.
Data Flow : This activity is used for Customized ETL Operations.
Power Query : This activity is used for ELT Operations.
Other Activities : Lookup, Procedure, Notebook, For Each…
These activities will be used in combination with above THREE activities
for flexible ETL and Aggregations.
Once you click Launch ADF studio, you will see 4 options.
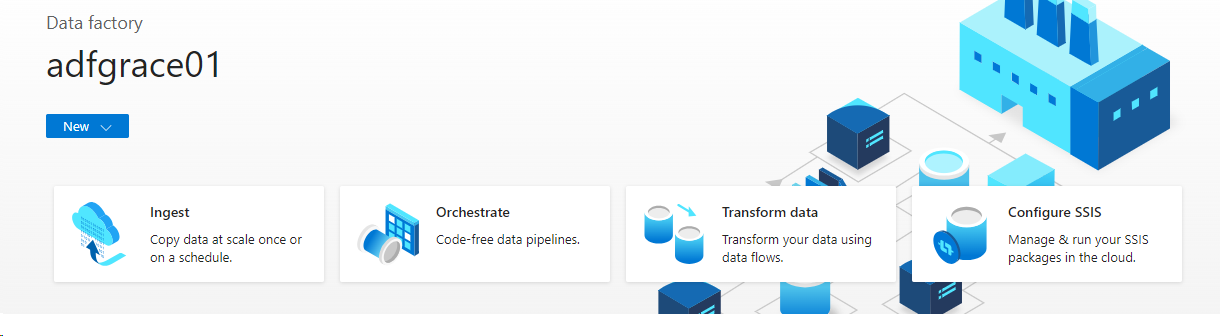
- Click on Ingest, as we want to copy data from one source to another.
You will be redirected to this screen
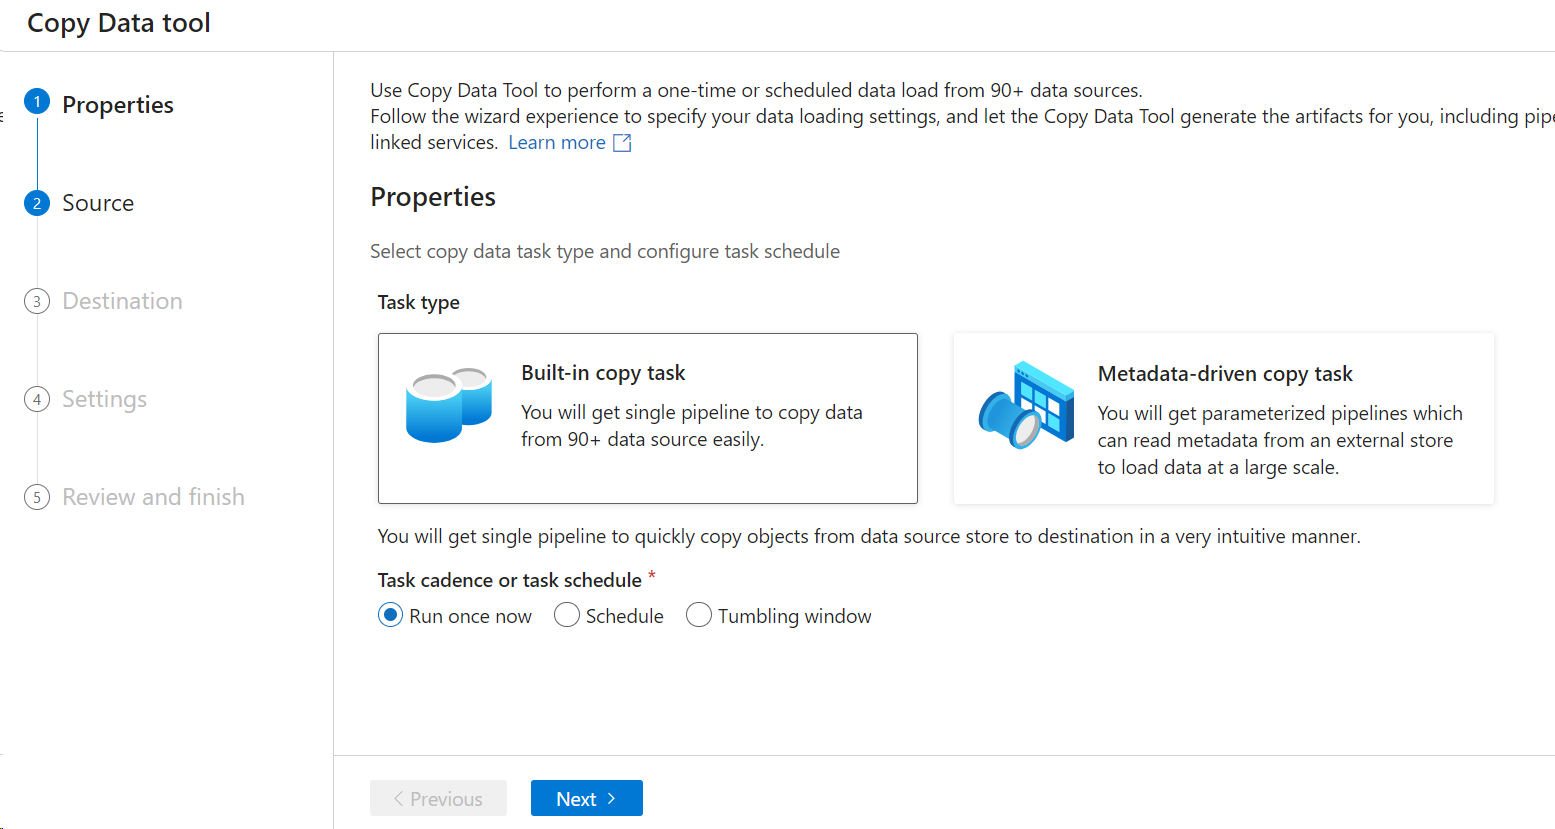
- Click on Built-in-copy task
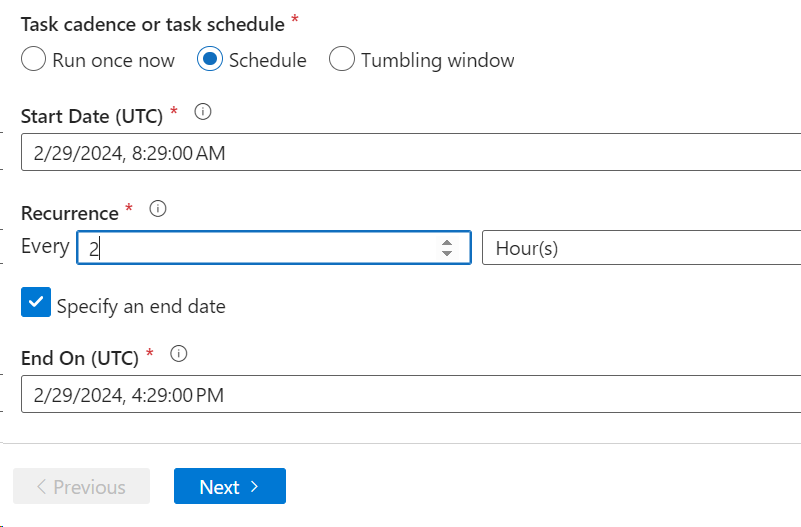
- You can select to Run once or set a Schedule to run it on a regular basis.
- Select the source
- Click the Azure Blob Storage, as our first storage account is an Azure Blog storage
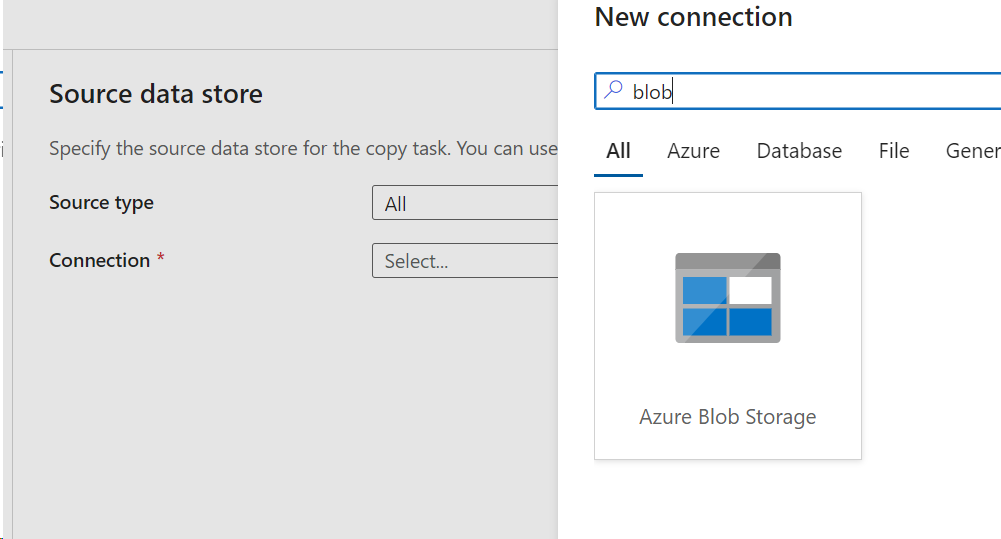
- We need to establish a connection to the storage account we created.
- Select the Azure Blob Storage, and give the new connection details
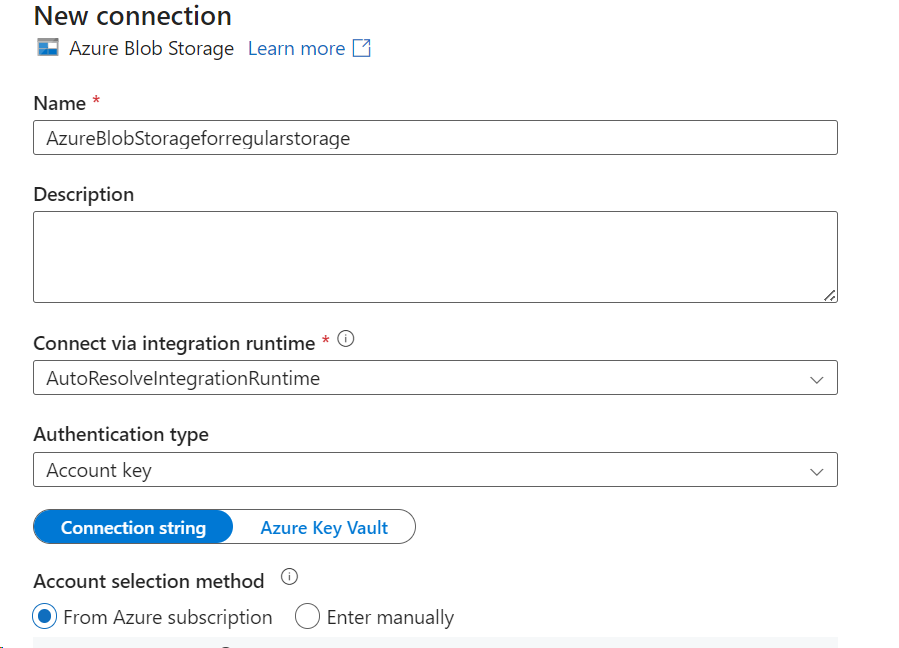
- Select your subscription and the storage account for the source data.
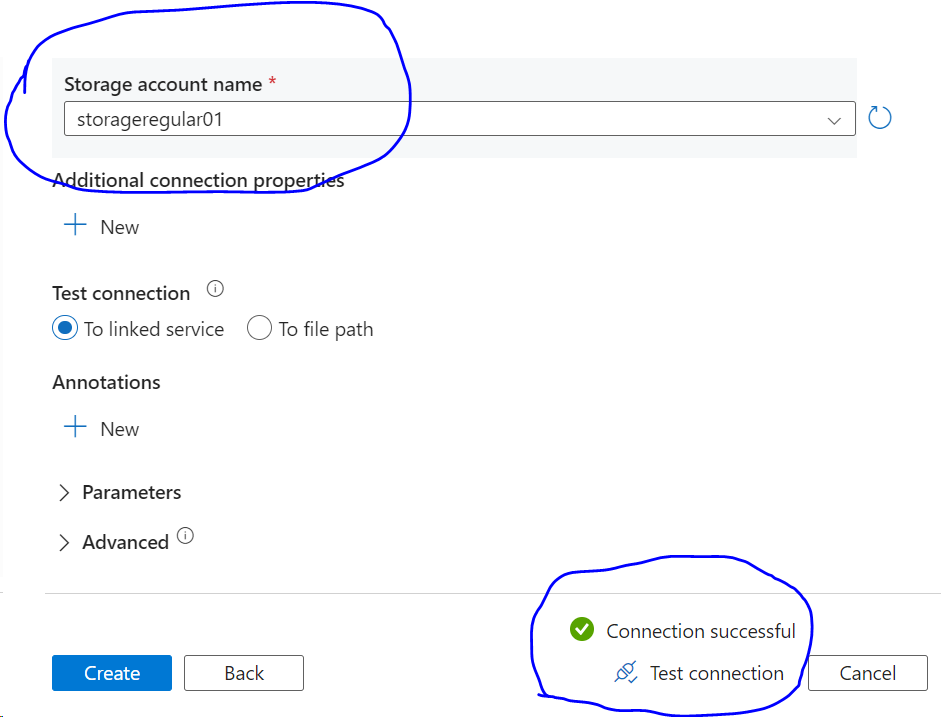
- You can test the connection by hitting the Test connection link in the bottom right.
- Click on ‘Create’ button.
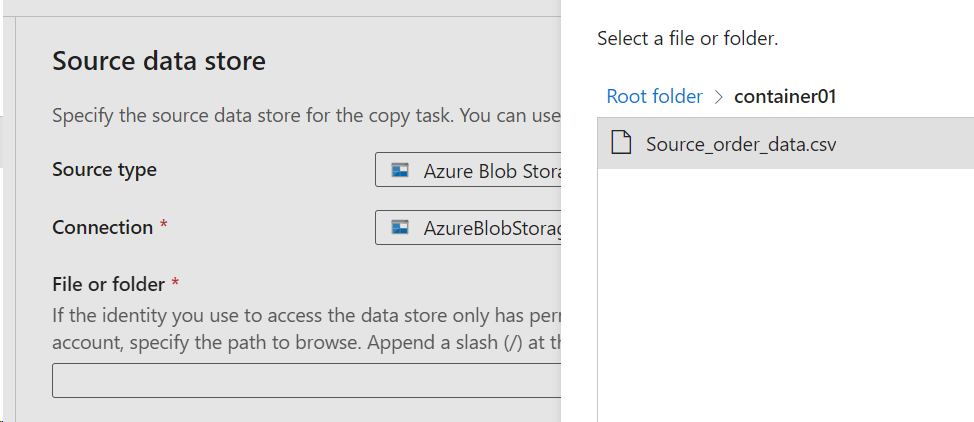
- Select your file from the container.
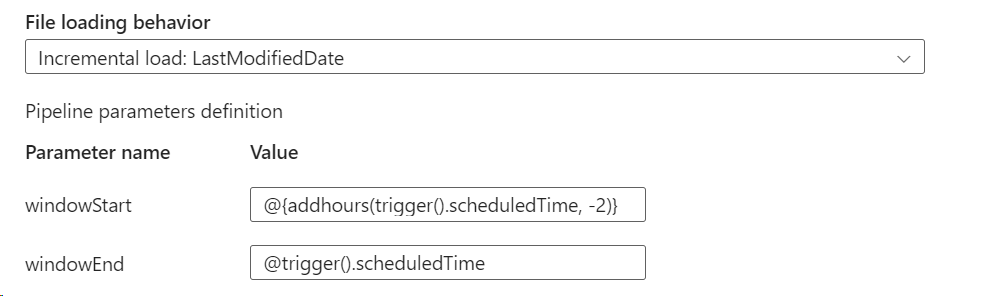
- Select the File Loading Behavior to Incremental Load:Last Modified Date
- 2 parameters are created by default.
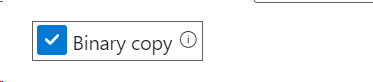
- Check the icon Binary Copy – This is to detect any structural changes
- Click next to configure the Destination.
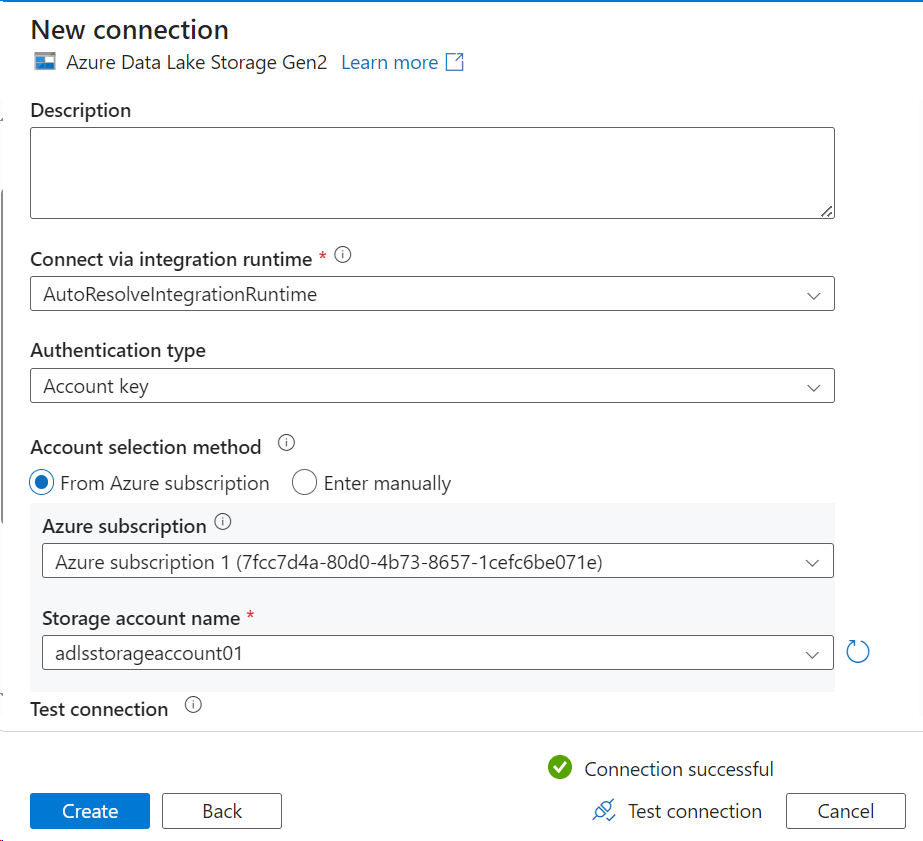
- We need to create a new connection for the destination
- You need to select Data Lake Storage Gen 2 this time, as our target storage is Azure Data Lake storage.
- Select the target container using the Browse button.

- Click Next and give a Task Name
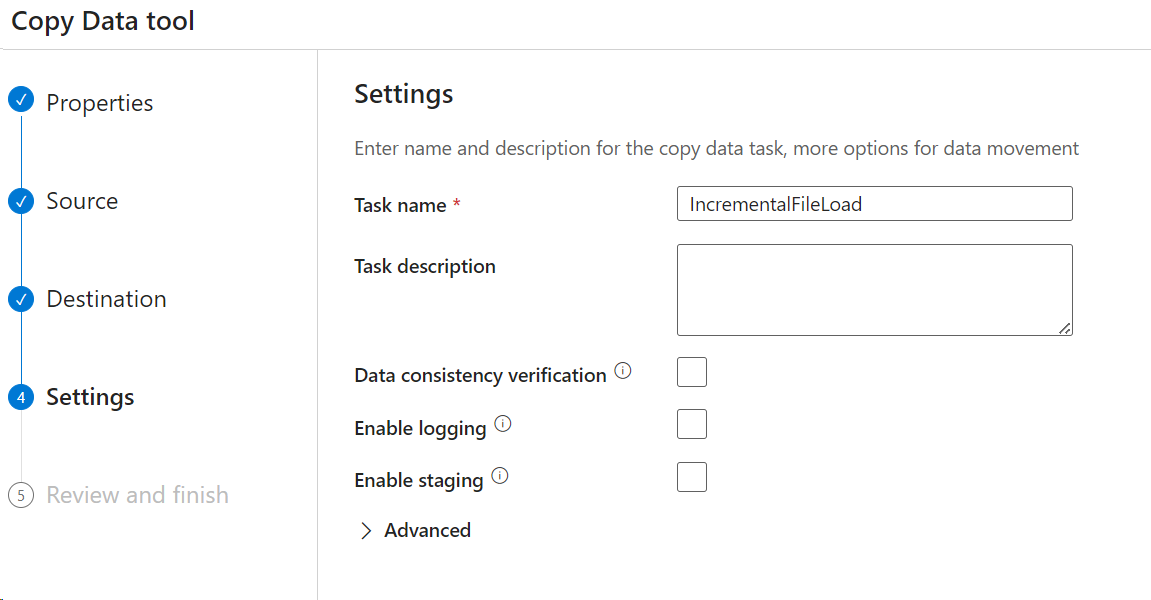
Click Next 🡪 Review and click Next

- Once the deployment is complete, click on Finish.
This will be your first pipeline.
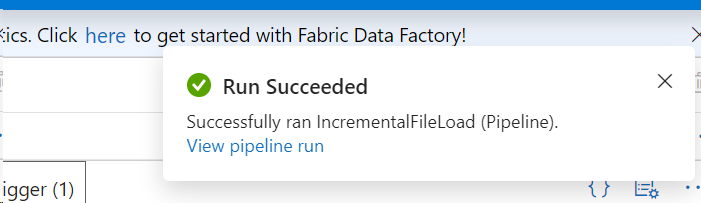
This pipeline will be automatically validated and triggered as per the schedule.
Step 5: Test the incremental load pipeline
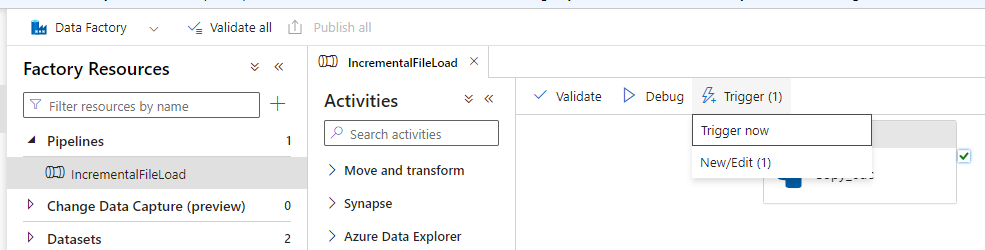
- Click the Author button (2nd button on the left)

- Expand and select the pipeline created in the above step.

- Hit the Trigger Now button on the top

- Leave the start and end parameters as null and hit the trigger
- Go to the target container and check for the data

- You can see the data uploaded to the target container.
In order to test the upserts,
- Go to the original source file and insert a new line, and update one old line

- Save the file and upload to the source container again
- You can override the existing file

- You can preview the data after you uploaded it

- Now go to the Data Factory and trigger the pipeline which we created before
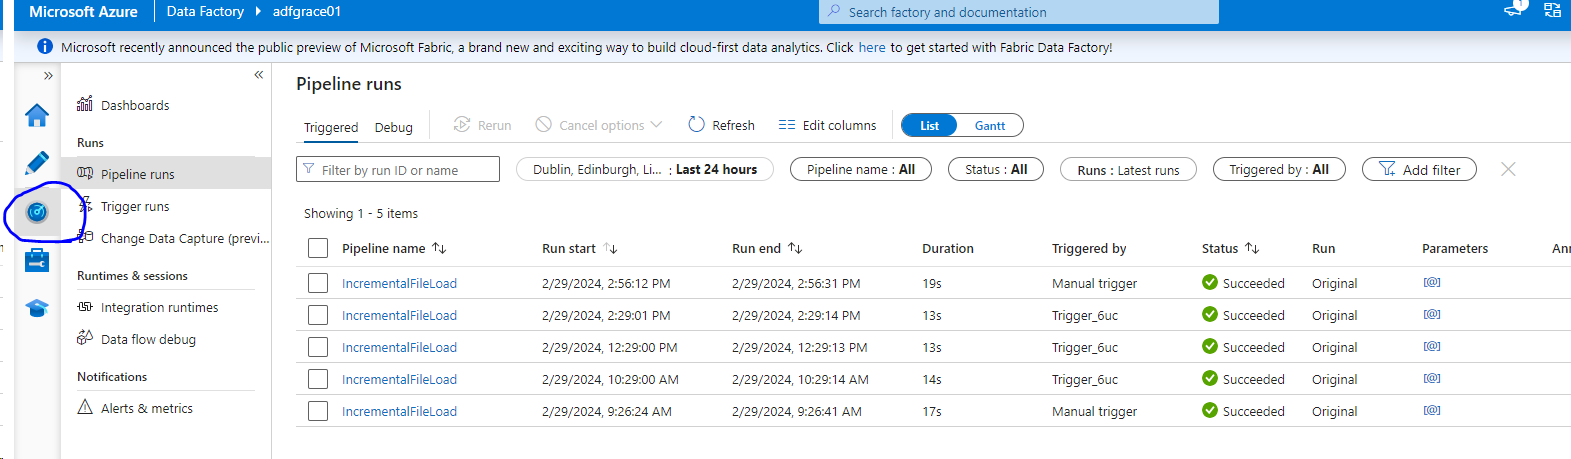
- We can monitor the pipeline runs by clicking the Monitor icon on the left.
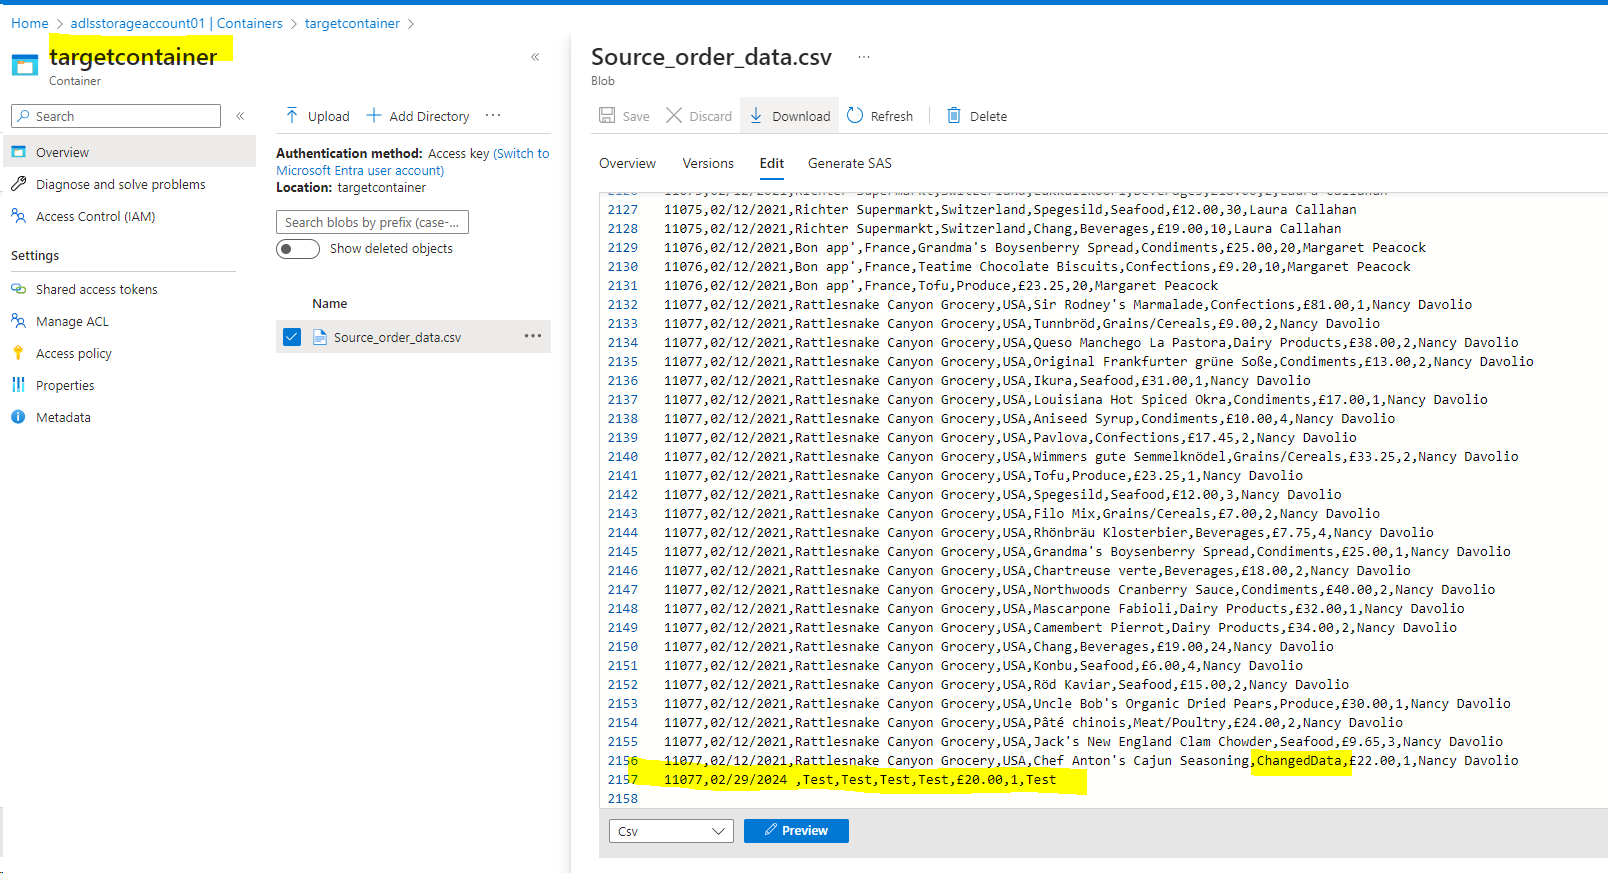
- Now, go back to the target container and you will be able to see the upsert data.
WHAT ARE THE OPTIONS TO CREATE THE ADF PIPELINES?
Option 1: From ADF Home Page: Ingest > This results in Copy Data Tool
Option 2: From ADF Home Page: New > Pipeline
Option 3: From Author Page: + Copy Data Tool
Option 4: From Author Page: + Pipeline
Note: Once finished with the practice, you can delete the resources created to avoid unnecessary expenses.
